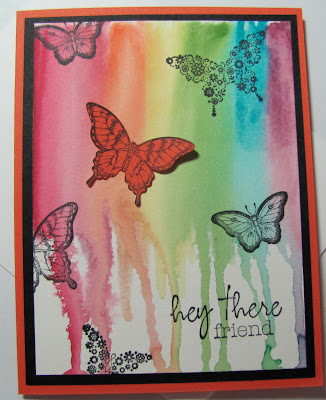
I created this sample to share at a recent demo meeting and with my Card maker's Club next week. If you are interested in joining a card club I'll be having an open meeting in May for my current club members and anyone else interested in seeing what it's all about. We learn new techniques, projects and of course create fabulous cards.
Contact me for more details.
 |
| Here was my sample. Don't you just love the "hey there friend"! It's from the intro kit when you sign up for My Paper Pumpkin!!! |
 |
| Start with some bright markers - from left - right (Raspberry Ripple, Primrose Petals, Tangerine Tango, Summer Starfruit, Gumball Green, Temmpting Turquoise and Rich Razzleberry) |
 |
| Using Watercolour paper, colour the top of the card base about 1/4 - 1/3 of the way down. |
 |
| Use an aqua painter to pull the colour down the paper. I start with the lightest colour first. |
 |
| Spritz with water and allow the colour to drip down the paper. |
 |
| Let dry. My paper fell forward and landed in a puddle of ink. No worries as I fixed it in my sample. |
 | ||
| Tada! Butterfly strategically placed! Crisis averted!! |
Hope you enjoyed this fun technique and photo tutorial.
Cheers,
K

So cool! I may just have to share this technique with my stamp club ladies!! TFS!
ReplyDelete